Brian (2006)
Brian
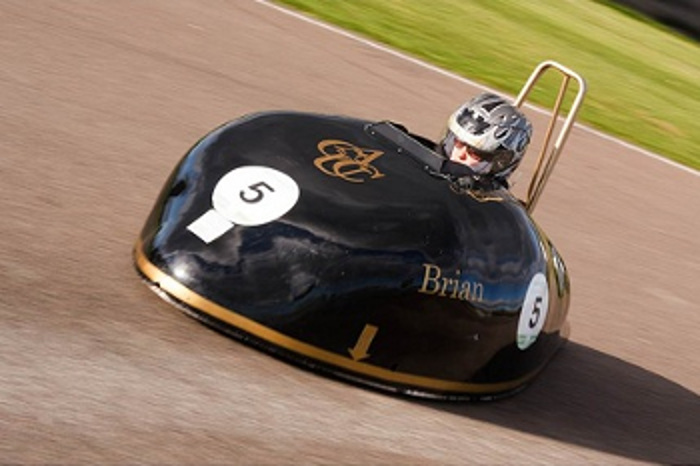
Brian, the team's 4th car is Greenpower’s longest serving race car, racking up over 5,500 race miles in 10 years and still competing as of the 2016 International Finals at Rockingham last October.
Construction Techniques
Chassis
The structural frame of Brian is made from the carbon fibre honeycomb composite sheeting used for commercial aircraft flooring. The team acquired a large 8 x 4 ft sheet. The main chassis can be seen in the photos in the gallery and is effectively a single large C section beam.This structure is glued together with araldite with a “glass bubble” filler and has stayed ‘rocksolid’ since the day it was made. Wheel mountings and motor/gearbox mountings are on separate steel (front) and aluminium (rear) sub frames which typically attach to the honeycomb structure by clamping 50mm x 70mm steel plates either side of the honeycomb and tightening the bolts onto 10mm steel crush tubes.
The steering uprights are 20mm round steel bar, bolted onto 12mm rose joints for the steering pivots. The stub axles are long M12 bolts. All steering rods and tie rods joints pivot on rose joints. This produces a strong reliable, adjustable system which is commendably accurate and free from play or lost motion. The tie rod is a right hand thread on one end and a left hand thread on the other so that toe in can be adjusted to sub millimetre precision without unbolting anything.
Body
The body of Brian was designed to follow low drag profiles generated by NASA software (!) with subtle bulges for the wheels. It was necessary that the body should accurately reproduce the design, so we cut out a series of 6mm MDF profiles, (one every 80mm - 33 in all) and bolted these together with M8 studding. The club was organised into a production line with 4 workstations for this job:
- Cut out basic rectangle
- Drill studding index holes
- Draft profile onto the MDF with pencil
- Cut out with band saw and jigsaw
This was a great introduction to production techniques, and got a time consuming job done in only 2 evenings.We used the negative profiles, filled in between with builders foam (the squirty stuff from cans) then cut off the excess between profiles when it was hard.The surface was then roughly levelled with a mixture of Polyfiller and sand –this gives a roughish surface which is easily sanded to shape. (Incidentally don’t use sand intended for concrete which has some big lumps in it... oops, guess who bought the wrong stuff at Homebase) Finally a finishing surface of filler was applied and sanded smooth to the final contours. This surface was painted with “high build” primer paint and sanded smooth again before being given a final coat of emulsion paint and several coats of floor wax and some PVA mould release agent. This procedure worked OK I think but was only possible because of the shape of Brian, it was good in being a 2 stage process instead of the normal 3 stages, but bad in that a lot of time was spent bending into a large concave mould & cleaning out the dust with a hoover.
The body was created by laying one layer of carbon fibre weave then two layers of glass fibre weave, brush applying the epoxy resin. When this had cured it was prised out of the mould (with difficulty!), cleaned up and then put back in to apply strengthening ribs to the inside. These were made by gluing on foam in the required positions and rosining 2 layers of glass tape round the outside of the foam. This technique worked exceedingly well – Brian’s body is VERY rigid in spite of its large size and relative lightness.